Why your car sensors fail after a glass installation
Modern vehicles are no longer just mechanical machines; they are rolling computers encased in steel and glass. When you experience a cracked windshield, you might think a quick chip repair or a same-day mobile service is the easiest path forward. However, as a master glazier with over 25 years of experience handling everything from high-rise curtain walls to precision-engineered automotive glass, I can tell you that a window is never just a piece of glass. It is a critical optical component. When your lane-departure warning, collision avoidance, or rain sensors fail after a new glass installation, it is rarely a computer glitch. It is a failure of physics, geometry, and installation precision.
The Sales Pitch Takedown: A Reality Check
I recently sat across from a vehicle owner who was bragging about the deal they got from a high-pressure mobile service glass installer. They paid half the price of the OEM glass and had it done in their driveway in forty minutes. Two days later, their adaptive cruise control wouldn’t engage, and their emergency braking system kept ghost-braking on the highway. I had to explain to them that while the glass looked ‘seamless’ to their eyes, to the car’s Advanced Driver Assistance Systems (ADAS) camera, it looked like a funhouse mirror. They saved three hundred dollars on the install but were looking at fifteen hundred dollars in recalibration and glass replacement costs. The ROI on cheap glass is always negative when you factor in the safety of your family.
“Installation is just as critical as the window performance itself. A high-performance window installed poorly will fail.” — AAMA Installation Masters Guide
The Physics of the Optical Path
To understand why sensors fail, we must perform a ‘Glazing Zooming’ on the glass itself. Most modern windshields are a laminate sandwich: two layers of glass with a Polyvinyl Butyral (PVB) interlayer. In a climate context where heat is the enemy, such as the American South or the desert Southwest, the Solar Heat Gain Coefficient (SHGC) of this glass is vital. We want the Low-E coating on Surface #2 to reflect long-wave infrared radiation back into the atmosphere. However, if the glass installer uses a sub-par aftermarket lite, the refractive index (n) of that glass might be inconsistent.
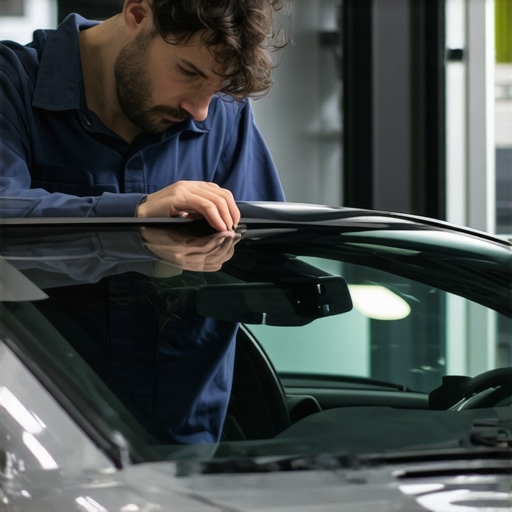
Think of the ADAS camera mounted behind your rearview mirror. It is focused through a specific ‘window’ in the glass, often surrounded by a black ceramic frit. If the glass has even a minor ‘wave’ or thickness variation of a fraction of a millimeter, it bends the light. This is Snell’s Law in action. A light ray traveling from the road, through the air, and into the glass is refracted. If the glass thickness is inconsistent, the camera perceives an object to be six inches to the left of its actual position. At sixty miles per hour, that six-inch error is the difference between a safe lane-keep and a head-on collision.
The Installation Autopsy: Where It Goes Wrong
The failure usually starts at the ‘Rough Opening’ of the vehicle—the frame where the glass sits. A ‘caulk-and-walk’ installer will often ignore the precision of the urethane bead, which I call the ‘glazing bead’ in this context. If the urethane is applied too thickly at the top and too thinly at the bottom, the pitch of the glass changes. This alters the ‘Look Down’ angle of the camera sensors.
Furthermore, many mobile service providers rush the cure time. In hot climates like Texas or Arizona, the high ambient temperature can cause the urethane to skin over too quickly, preventing a proper chemical bond with the frit. If the glass shifts even two millimeters while the vehicle is being driven away, the sensor bracket is now misaligned. The camera is no longer looking through the center of its designated aperture. This leads to ‘optical distortion’ where the sensor’s software sees a blurred image and simply shuts down as a safety precaution.
“The standard practice for installation of exterior windows requires that the glazing must be shimmed and leveled to within tolerances that allow for the designed operation of all integrated hardware.” — ASTM E2112
Thermal Management and Sensor Overheating
In Southern climates, we deal with radiant heat that can reach 200 degrees Fahrenheit on a dashboard. High-quality glass uses specific tints and coatings to manage this heat. If you replace your windshield with a ‘value’ option that lacks proper IR-reflective properties, the area between the sensor and the glass becomes an oven. Most ADAS cameras have an operating ceiling; once the internal CMOS chip reaches a certain temperature, the system enters a fail-safe mode. Proper glazing isn’t just about keeping the rain out; it is about thermal management for the electronics that keep you alive.
The Myth of the ‘Same-Day’ Mobile Fix
We see it all the time: ‘Chip repair in 15 minutes!’ While a resin injection can stop a crack from spreading, it does not restore the optical clarity required for a sensor path. If the chip is within the ‘critical vision area’ of the camera, a repair is a failure. The resin has a different refractive index than the glass, creating a permanent blind spot for the car’s ‘eyes.’ A professional glass installer knows when to repair and when the safety requirements of the frame and sash dictate a full replacement with OEM-equivalent glass that has been tested for VT (Visible Transmittance) and U-Factor consistency.
How to Ensure Your Installation Succeeds
To avoid sensor failure, you must demand a ‘Full Frame’ approach. Ensure the installer uses a high-modulus urethane that matches the vehicle’s structural requirements. Ask about the ‘Sill Pan’ equivalent in cars—the cowl area. If the weep holes in the bottom molding are blocked by excess adhesive, water will back up and fry the bottom-mounted sensors or the wiring harness. Water management is a science, whether you are building a skyscraper or a sedan.
Ultimately, do not buy the marketing hype; buy the numbers. Check the NFRC or equivalent ratings on your glass. Ensure your installer understands that they aren’t just fitting a piece of glass; they are recalibrating a safety system. Precision in the rough opening, the use of proper shims if necessary for alignment, and a respect for cure times are the only ways to ensure your car’s brain can still see the road ahead.
How to Ensure Your Car Sensors Work After Glass Replacement
Verify Glass Specifications
Check the Urethane Bead
Perform ADAS Recalibration