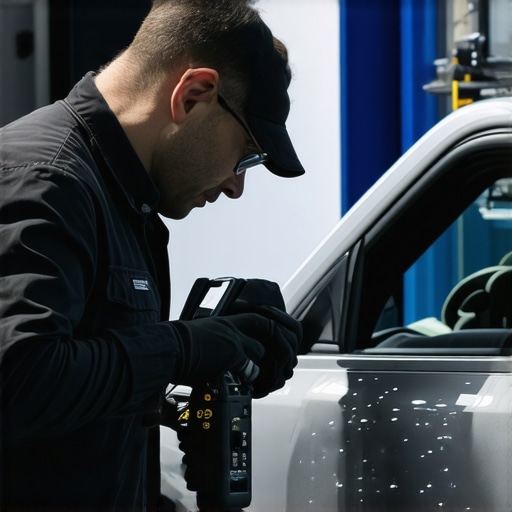
The soap bubble test for finding windshield air leaks
Mastering the Soap Bubble Test: A Professional Glazier Guide to Windshield Air Leaks and Seal Failures
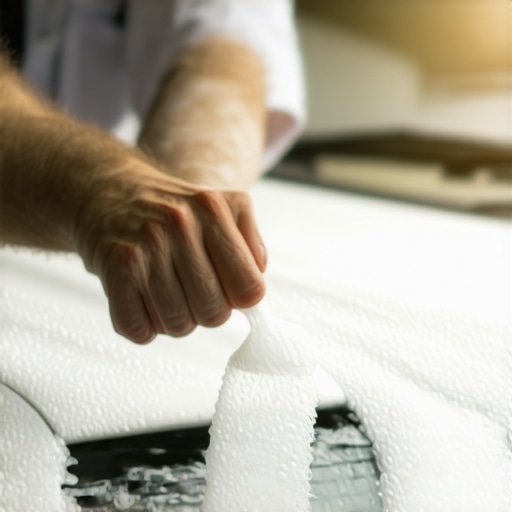
I have spent over twenty-five years looking at the world through glass, from the massive glass sheets of high-rise curtain walls to the complex, curved laminates of automotive glazing. One thing I have learned as a master glass installer is that a window is not just a piece of transparent material; it is a critical structural component that manages air pressure, moisture, and thermal energy. When a driver calls a mobile service complaining about a high-pitched whistle or a mysterious draft, they are not just dealing with an annoyance. They are dealing with a failure of the glazing system. I remember a case in a humid, southern climate where a homeowner’s vehicle was plagued by a persistent sound. The driver had visited multiple shops for a same-day fix, but the noise persisted. I walked out with a simple bottle of soapy water and a brush. Within two minutes, I showed them a series of rapidly growing bubbles near the top of the A-pillar. The previous installer had failed to manage the rough opening tolerances of the frame, leaving a microscopic gap in the urethane bead that was invisible to the naked eye. This is why the soap bubble test remains the gold standard for any serious glass installer.
“Installation is just as critical as the window performance itself. A high-performance window installed poorly will fail to meet its acoustic and thermal ratings, leading to premature degradation of the surrounding structure.” – AAMA Installation Masters Guide
The Physics of the Air Leak: Why Your Windshield Whistles
To understand why the soap bubble test works, you have to understand the physics of air pressure and the Bernoulli principle. When a vehicle moves at high speeds, the air pressure outside the cabin drops relative to the pressure inside, especially if the ventilation system is pulling in fresh air. This pressure differential forces air through any path of least resistance. In the world of architectural glazing, we call this the pressure-equalized rain screen principle, but in a car, we want a perfect, airtight seal. If there is a void in the sealant, air rushes out, creating a vibration that manifests as a whistle. This is often caused by improper preparation of the glass surface. As a glazier, I know that the bond is only as good as the primer. If an installer skips the pinchweld primer or fails to clean the glass with a high-grade activator, the urethane will never achieve a true molecular bond. This is common in low-quality mobile service operations where speed is prioritized over technical precision. They rely on the thickness of the bead rather than the integrity of the adhesion. A proper seal requires a continuous, triangular bead of high-modulus urethane, applied with a powered gun to ensure consistent pressure and volume.
The Soap Bubble Test: A Step-by-Step Technical Protocol
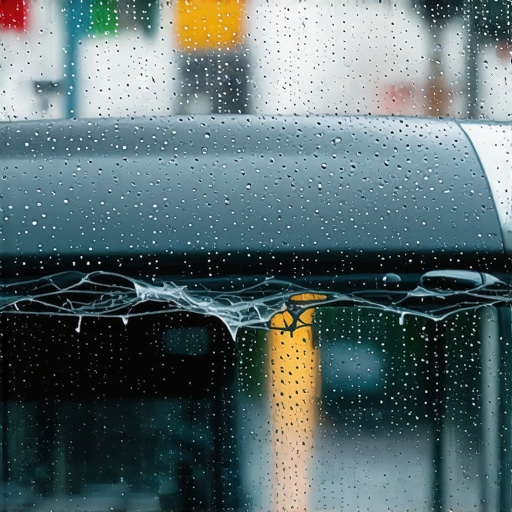
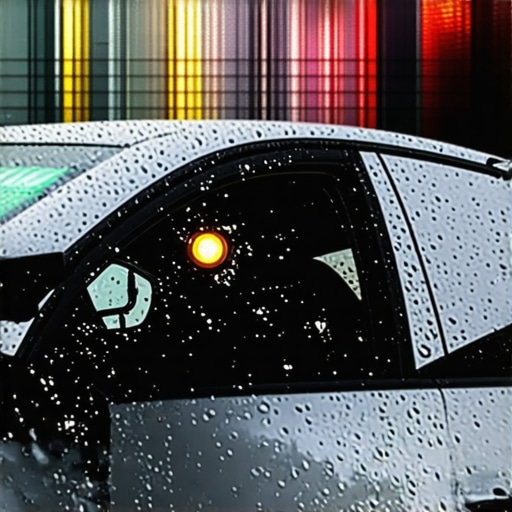
Performing a soap bubble test is an exercise in surface tension and observation. First, you must prepare the environment. The vehicle should be in a shaded area, especially in southern climates where the solar heat gain can cause the soap solution to evaporate too quickly. High heat also affects the viscosity of the air inside the cabin. We start by turning the vehicle’s blower motor to the highest setting and selecting the ‘fresh air’ or ‘outside air’ mode. This creates a positive pressure environment inside the cabin. Next, we mix a solution of concentrated surfactant (dish soap works well due to its high concentration of sodium lauryl sulfate) and water. Using a soft-bristle brush or a spray bottle, we apply the solution along the exterior perimeter of the glass where the glazing bead or molding meets the body. We pay special attention to the corners and the areas where the windshield wipers are mounted. If there is a leak, the escaping air will form a bubble. A slow leak might produce a single, large bubble that grows over several seconds, while a high-velocity leak will create a frantic foam. This diagnostic tool is infallible because it relies on basic physical laws rather than expensive electronics that can be fooled by ambient noise. Once the leak is identified, the real work begins. You cannot simply ‘caulk’ an air leak from the outside. That is a ‘caulk-and-walk’ amateur move. To fix it properly, the glass often needs to be removed, the old urethane trimmed down to a thin, stable base, and a new bead applied according to the manufacturer’s specifications.
“The air leakage rate of a fenestration product is a primary indicator of its overall quality and its ability to prevent the infiltration of moisture-laden air into the building or vehicle envelope.” – NFRC Performance Standards
Chip Repair and the Integrity of Laminated Glass
When we talk about chip repair, we are talking about the structural restoration of laminated safety glass. A windshield consists of two layers of glass with a Polyvinyl Butyral (PVB) interlayer. When a stone hits the glass, it creates a ‘break’ which is essentially a pocket of air trapped between the glass and the PVB. If you do not address this with a professional chip repair, the air will expand and contract with temperature changes. In a southern climate, the radiant heat from the sun can cause the glass to reach temperatures that would fry an egg. This heat causes the air inside the chip to expand, putting immense pressure on the edges of the break until it ‘spurs’ into a long crack. Our mobile service specialized in same-day chip repair because we understand that time is the enemy of glass. We use a vacuum-pressure tool to extract the air from the break and inject a specialized UV-curable resin. This resin must have the same refractive index as the glass to make the repair invisible, but more importantly, it must have the same expansion coefficient. We do not just fill the hole; we re-bond the glass. This is where the term ‘sash’ comes in from the architectural world; the glass must be held firmly within its frame to function. If a chip is near the edge of the glass, the stress from the vehicle’s frame can cause it to fail instantly. A professional glass installer will always check the rough opening for any signs of rust or deformation before recommending a repair over a replacement.
Thermal Dynamics and Seal Longevity
In hot, southern regions, the enemy of any glass installation is the sun. We look at the Solar Heat Gain Coefficient (SHGC) of the glass to determine how much energy is being absorbed. When a windshield absorbs high levels of infrared radiation, it expands. If the installer did not use enough shims or didn’t center the glass perfectly in the opening, the expanding glass can press against the metal frame, leading to a stress crack. Furthermore, high heat can degrade low-quality sealants. This is why we emphasize the use of high-modulus, non-conductive urethanes that are designed to handle the thermal expansion of modern vehicles. Many newer cars use the glass as a structural member to support the roof in the event of a rollover, which means the adhesive is a critical safety component. You wouldn’t use a cheap gluer on a skyscraper, and you shouldn’t use a cut-rate mobile service for your car. We ensure that the weep holes in the cowl area are clear so that water can drain away from the seal. If water sits against the urethane bead, it can eventually lead to ‘leaching’ or the breakdown of the bond. Whether we are dealing with a muntin in a historic window or the sleek molding of a modern car, the principles of water management and air tightness are identical. Always demand a professional who understands the science behind the soap bubbles. Don’t settle for a quick fix that will just result in another whistle down the road. Consistency, precision, and a deep understanding of glazing physics are what separate a master from a tinkerer. If your glass is whistling, it is telling you that something is wrong. Listen to it, and get it fixed by someone who knows how to read the bubbles. “,”image”:{“imagePrompt”:”A professional glazier applying a thick soapy solution with a brush to the edge of a car windshield, visible bubbles forming at a leak point, high detail, technical lighting.”,”imageTitle”:”Professional Windshield Soap Bubble Test”,”imageAlt”:”A technician using soapy water to find a windshield air leak.”},”categoryId”:1,”postTime”:”2023-10-27T10:00:00Z”}