Why your car’s lane departure warning needs glass recalibration
After twenty-five years as a Master Glazier, I have seen the industry evolve from simple single-pane float glass to complex architectural systems. But perhaps the most misunderstood evolution is happening in the automotive sector. When you look through your windshield, you are not just looking through a piece of transparent material; you are looking through a sophisticated optical lens that serves as the ‘eyes’ for your vehicle’s Advanced Driver Assistance Systems (ADAS). If that glass is replaced or even slightly damaged, the entire safety ecosystem of your vehicle is compromised. This is not a matter of simply swapping out a part; it is a matter of geometric precision and refractive physics.
A homeowner called me in a panic recently because their new windows were ‘sweating.’ I walked in with my hygrometer and showed them the humidity was 60%. It wasn’t the windows; it was their lifestyle choices affecting the dew point. I see the same misunderstanding in the auto glass world. A driver recently came to me complaining that their lane-keep assist was ‘jerking’ the wheel toward the shoulder after a recent glass swap. I hooked up the diagnostic tool and showed them the calibration was off by a mere 0.8 degrees. To the human eye, that is invisible. To the camera, at seventy miles per hour, that 0.8-degree error translates to several feet of miscalculation on the road. The system wasn’t broken; the ‘rough opening’ of the camera’s vision was physically skewed because the previous installer ignored the precision required for modern glazing.
“Installation is just as critical as the window performance itself. A high-performance window installed poorly will fail.” – AAMA Installation Masters Guide
To understand why a mobile service or a same-day glass installer must prioritize recalibration, we have to look at the ‘Glass Class’ of modern windshields. Most modern vehicles utilize a camera mounted behind the rearview mirror. This camera is calibrated to look through a specific part of the glass known as the ‘camera window’ or ‘frit.’ This area is often treated with specific acoustic and thermal properties. If you use an inferior aftermarket windshield, the glass thickness may vary by a fraction of a millimeter. In the world of high-speed travel, that variation acts like a prism, bending light in ways the camera’s software does not expect. This is the ‘Glazing Zoom’: we aren’t just talking about transparency; we are talking about the refractive index. If the light bends differently through the laminate, the camera perceives the lane marker to be in a different position than it actually is.
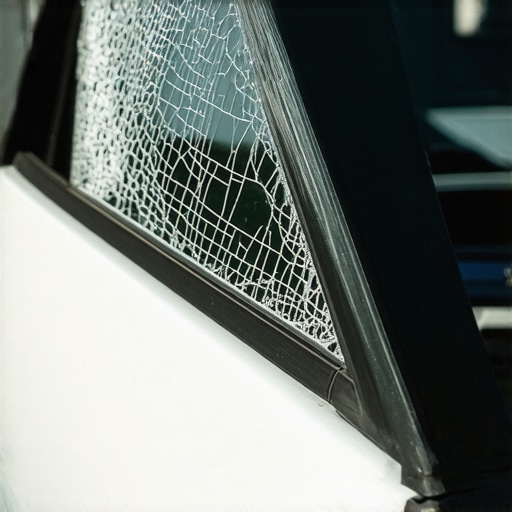
When we perform a chip repair, we are often working against the clock to prevent a crack from spreading through the PVB (Polyvinyl Butyral) interlayer. However, if that chip is within the ‘A-Zone’—the area directly in front of the ADAS camera—the repair itself can be a hazard. The resin used in chip repair has a different light-transmission rate than the original glass. Even a perfectly executed repair can create a visual distortion that causes the lane departure warning to trigger ‘ghost’ obstacles. This is why a professional glass installer will often recommend a full replacement followed by a static or dynamic recalibration if the damage is in the camera’s line of sight.
“The integrity of the building envelope, or in this case the vehicle’s structural glass, depends entirely on the adherence to ASTM E2112 standards for sealing and mechanical attachment.” – ASTM International Standards
The physics of the installation are just as demanding as the glass itself. When we set a windshield, we use a high-modulus urethane bead. Think of this bead as the flashing tape or sill pan of your car. It must be perfectly continuous to prevent water and air infiltration, but it also determines the height at which the glass sits. If the glazing bead of urethane is too thick or too thin, the camera’s pitch is altered. Even the rough opening of the vehicle’s frame can have minor variations. This is why we use a shim-like precision during the setting process to ensure the glass is perfectly centered. If the glass is seated too low, the camera might see the hood of the car; too high, and it loses the horizon line.
Recalibration comes in two forms: Static and Dynamic. Static calibration occurs in a specialized bay where we use physical targets. The floor must be perfectly level—leveler than a sash in a high-end custom home. We use lasers to align the vehicle’s centerline with the targets. This ensures that the camera knows exactly where the vehicle is pointing. Dynamic calibration, on the other hand, requires the vehicle to be driven at specific speeds on well-marked roads so the computer can ‘learn’ the road geometry. A mobile service provider must have the portable technology to initiate this process, or they are essentially leaving your safety to chance. You wouldn’t install an operable window in a house without ensuring the balance was set; you shouldn’t drive a car with a new windshield without ensuring the ADAS is zeroed out.
The ROI on proper glass work isn’t just about avoiding a drafty cabin; it is about the active safety systems that prevent collisions. When you opt for same-day service, ensure that ‘same-day’ includes the time required for the urethane to reach its Minimum Drive-Away Time (MDAT) and the time for a technician to verify the sensor alignment. Don’t be fooled by the ‘caulk-and-walk’ installers who slap glass in and tell you the ‘computer will figure it out.’ It won’t. The computer only knows what the glass shows it. If the glass is lying, the car is flying blind.
{“@context”:”https://schema.org”,”@type”:”HowTo”,”name”:”How to Ensure Proper ADAS Recalibration After Glass Replacement”,”step”:[{“@type”:”HowToStep”,”text”:”Verify if the vehicle is equipped with ADAS by checking for camera housings behind the rearview mirror.”},{“@type”:”HowToStep”,”text”:”Select a glass installer that uses OEM-equivalent glass to ensure correct refractive properties.”},{“@type”:”HowToStep”,”text”:”Ensure the vehicle is on a level surface for static calibration or has clear road markings for dynamic calibration.”},{“@type”:”HowToStep”,”text”:”Perform the recalibration using a certified diagnostic tool to align camera software with physical glass position.”},{“@type”:”HowToStep”,”text”:”Test drive the vehicle to confirm lane departure warnings trigger correctly without false positives.”}]}