How to spot bubbles in your resin before the technician leaves
The Anatomy of a Failed Chip Repair
As a Master Glazier with a quarter-century in the field, I have seen every shortcut in the book. There is a common misconception that a mobile service for glass is a simple plug-and-play operation. It is not. Whether I am sealing a curtain wall on a skyscraper or performing a same-day chip repair on a windshield, the physics of glass remain unforgiving. A chip is essentially a miniature structural failure of the glass lite. When a technician arrives to perform a chip repair, they are not just ‘filling a hole’; they are attempting to restore the structural integrity of a laminated safety glass system. If you do not know what to look for, you might be left with a repair that looks good for an hour but fails the moment you turn on your defroster in a Chicago winter. I remember a specific case that highlights this perfectly.
The Condensation Crisis: A Narrative Autopsy
A homeowner called me in a panic because their new windows were ‘sweating’ and the recent windshield repair I had inspected for them was beginning to cloud over. I walked in with my hygrometer and showed them the humidity was 60 percent. It was not the windows; it was their lifestyle choices in a sealed environment. However, when we looked at the windshield chip repair they had received from a ‘caulk-and-walk’ mobile service, the issue was purely technical. The technician had rushed the vacuum cycle. Under my magnifying lamp, I showed the client exactly where the air remained trapped. It looked like a tiny silver needle reflecting the light. That was not ‘sweat’; it was an air pocket that had expanded as the glass heated up in the sun. It was a failure of the installation process, not the material itself.
“Installation is just as critical as the window performance itself. A high-performance window installed poorly will fail.” AAMA Installation Masters Guide
The Physics of the Vacuum and Pressure Cycle
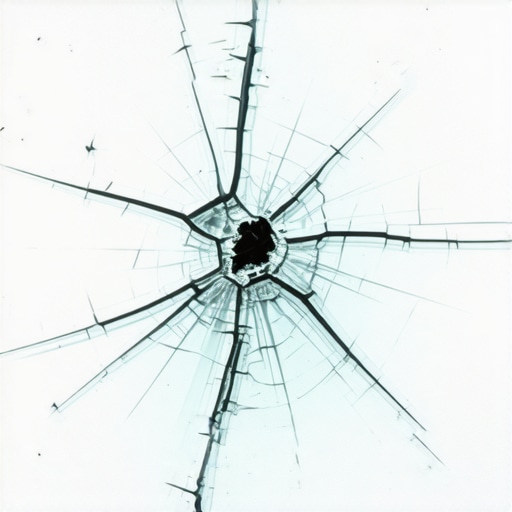
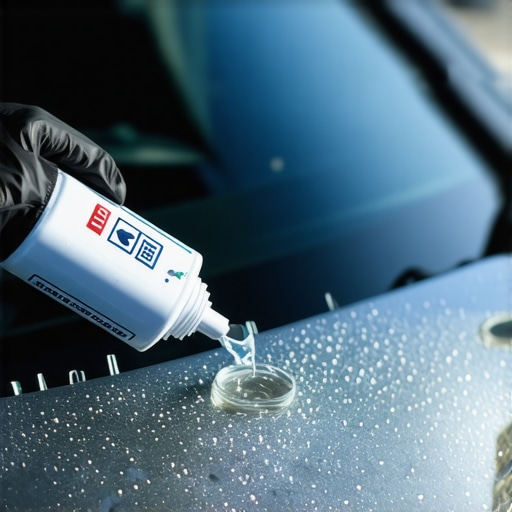
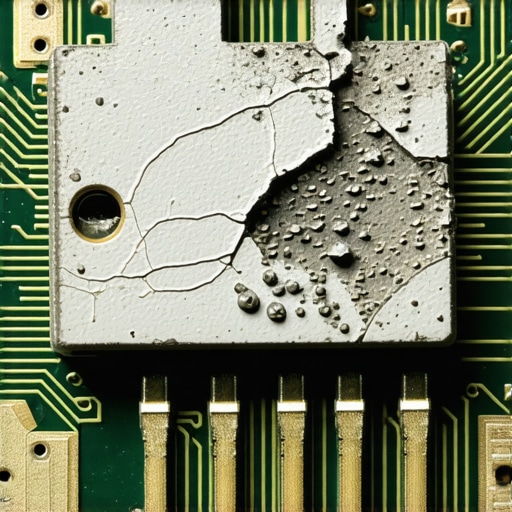
To understand why bubbles occur, we have to look at the ‘Rough Opening’ of the glass fracture. When an object strikes the glass, it creates a void. This void is filled with air and microscopic debris. A professional glass installer uses a bridge and injector tool to create a vacuum. This vacuum is designed to pull the air out of the ‘legs’ of the crack. If the technician skips the vacuum stage or does not hold it long enough, air remains. After the vacuum, the tool switches to a pressure cycle, forcing the resin into those vacated spaces. If the air was never fully removed, the resin simply compresses the air into a tiny, nearly invisible bubble. This is why ‘same-day’ speed can be the enemy of quality. The resin requires time to displace the air via capillary action. If the technician is in a hurry to get to the next mobile service call, they might pull the bridge too early, allowing atmospheric pressure to push air back into the uncured resin. This creates a ‘flower’ or ‘blossom’ effect inside the glass.
Why Your Climate Matters: The North/Cold Perspective
In colder climates like Minneapolis or Toronto, the U-Factor of the glass becomes a critical concern. Cold glass is more brittle and prone to thermal shock. When a technician performs a chip repair in the cold, the resin viscosity increases. It becomes thick, like cold molasses. This makes it significantly harder to evacuate air from the fracture. If the glass installer does not pre-warm the glass to a stable temperature, the resin will not flow into the microscopic crevices of the break. This results in ‘cold-shunting,’ where the resin sits on top of the air pocket rather than displacing it. Furthermore, if air is trapped in a repair in a cold climate, the first time you hit the glass with the heater, that air will expand at a different rate than the glass and the resin. This thermal expansion differential is what causes a small chip to ‘spider’ across the entire surface. You need a warm-edge approach to repair, even in a mobile context.
The 5-Point Bubble Inspection List
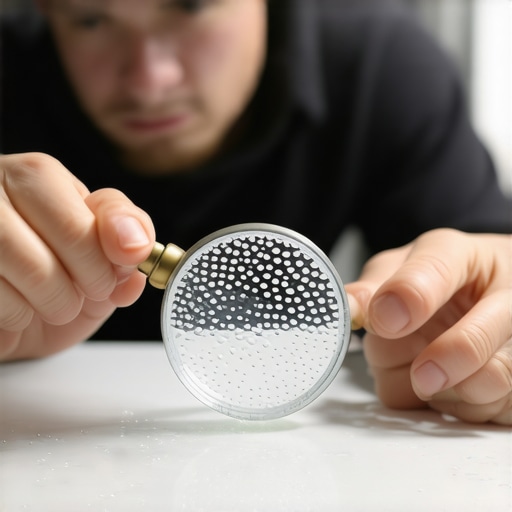
Before you sign off on that mobile service and let the technician leave, you must perform a rigorous inspection. Do not just look at the glass from the driver’s seat; get out and look at it from multiple angles. 1. The Silver Reflection Test: Look at the repair at a 45-degree angle. If you see any silver glints, that is air. Glass and resin have a similar refractive index, but air does not. Air reflects light like a mirror. 2. The Pit Fill Check: Ensure the ‘pit’ (the point of impact) is flush with the rest of the glass. It should not be a divot or a hump. 3. The Leg Inspection: Follow every ‘leg’ or ‘wing’ of the crack to its tip. If the line disappears and then reappears, there is an air gap in the middle. 4. Shadowing: Use a white piece of paper behind the repair. If the repair casts a dark shadow on the paper, it means the resin did not fully penetrate the break. 5. The Glazing Bead of Resin: Look for any overflow that was not properly scraped with a razor. Excess resin can hide bubbles underneath it.
“The NFRC provides a reliable way to determine the energy performance of windows, doors, and skylights.” NFRC Standard Bulletin
The Science of Resin Curing and Refraction
A master glazier knows that the curing process is where most errors occur. We use UV-curing resins because they allow for a controlled transition from liquid to solid. However, if the technician uses a low-intensity UV lamp or pulls the curing film off too quickly, the resin can shrink. This shrinkage creates ‘vacuum bubbles’ within the repair itself. This is not air from the outside, but a void created by the resin pulling away from the glass walls. This is why the ‘Glazing Bead’ of the repair must be perfectly managed. Even though we are not working with a traditional Sash or Muntin, the structural bond between the resin and the glass molecules is what prevents the crack from spreading. If the technician does not understand the chemistry of the anaerobic bond, the repair is nothing more than a temporary cosmetic fix.
Don’t Accept ‘Good Enough’
In my 25 years, I have never seen a ‘caulk-and-walk’ installer admit to leaving a bubble. They will tell you it is just ‘scar tissue’ in the glass. That is a lie. While some repairs will never be 100 percent invisible due to the refractive index of different glass batches, a bubble is a physical void. It is a sign of a rushed job. You are paying for a professional glass installer to restore the safety of your vehicle or home. If you spot a bubble, demand that the technician re-inject or bridge the gap. Once the resin is cured, it is nearly impossible to fix without drilling into the glass, which creates its own set of structural risks. Remember, water management and structural integrity are sciences. Whether it is a Sill Pan in a rough opening or a resin injection in a chip, the principle of ‘No Voids’ is the only standard that matters. If they cannot get the air out, they have not finished the job. A same-day service should not mean a same-week failure. Hold your technician to the standard of a master glazier, and do not let them leave until the glass is clear and the air is gone. The safety of your windshield, and your visibility on the road, depends on that tiny drop of resin being perfectly placed and perfectly cured.