The secret to fixing a windshield chip in under twenty minutes
A stone chip in your windshield is not merely a cosmetic blemish: it is a structural breach in a complex safety system. As a master glazier with over two decades of experience, I have seen thousands of drivers ignore a small bullseye only to have it blossom into a full-width crack the moment they hit a pothole or turn on the defroster. The secret to a permanent, twenty-minute repair lies in the physics of pressure, vacuum, and resin chemistry. When a projectile strikes your glass, it does not just remove a chunk; it creates a microscopic void between the outer layer of glass and the polyvinyl butyral (PVB) interlayer. To fix this, you cannot just smear some glue on top. You have to manage the air and moisture trapped inside that void.
The Anatomy of a Chip Failure
I remember a specific call from a driver in Phoenix who had a tiny star break right in his line of sight. He told me it had been there for three days and was getting bigger. I walked over with my hygrometer and showed him the humidity trapped inside the glass. The previous night’s rain had been sucked into the break by capillary action. If I had simply injected resin then, the moisture would have prevented a bond, and the repair would have failed within a week. It was not the glass that was the problem: it was the environmental contamination. This is why a professional glass installer prioritizes cleaning and drying the rough opening of the break before the first drop of resin is even touched.
“Installation is just as critical as the window performance itself. A high-performance window installed poorly will fail.” – AAMA Installation Masters Guide
This principle applies just as much to auto glass as it does to a high-rise curtain wall. If the bond between the resin and the silicate surface is compromised by dirt, rain-repellent chemicals, or simple air pockets, the structural integrity is zero. In hot climates like the South, the Solar Heat Gain Coefficient (SHGC) of your glass plays a massive role in repair success. A windshield sitting in the sun can reach temperatures exceeding 150 degrees Fahrenheit. If you try to perform a chip repair on glass that hot, the resin will thin out too much, its viscosity will drop, and it will fail to fill the radial cracks properly. A professional mobile service technician will always shade the glass and bring the temperature down to a workable range to ensure the anaerobic resin cures at the correct rate.
The Vacuum and Pressure Cycle
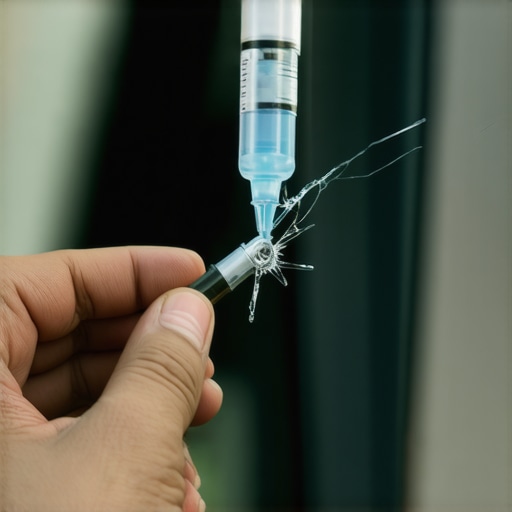
The real secret that separates a same-day professional repair from a failed DIY attempt is the use of a professional bridge and injector system. The process is a surgical sequence. First, the glass installer uses a carbide scribe to remove loose shards from the pit. Then, the bridge is mounted over the break. The injector creates a vacuum, sucking the air out of the laminate layers. This is the most critical phase. If air remains, the repair will be visible as a silver reflection. Once a vacuum is established, the technician switches to a pressure cycle, forcing the high-viscosity pit resin into every microscopic fissure. This requires an understanding of the glass’s flex point. Too much pressure and you will pop the crack: too little and the repair remains weak.
Why Thermal Stress is Your Windshield’s Enemy
In regions with extreme temperature swings, the glass is constantly expanding and contracting. Windshields are made of laminated safety glass, meaning two layers of glass are sandwiched around a plastic interlayer. When a chip occurs, these layers begin to delaminate. If you are in a cold climate, using your defroster sends a wave of thermal shock through the glass. The inner layer expands while the outer layer, chilled by the winter air, remains contracted. This tension is what causes a chip to ‘run.’ The professional resin used in a chip repair is designed to have a coefficient of thermal expansion similar to the glass itself, ensuring that when the temperature shifts, the repair moves with the glass rather than pulling away from it.
“Properly executed repairs restore the structural integrity of the fenestration unit and prevent further degradation of the laminate bond.” – ASTM E2112 Standard Practice
The Final Cure: Photochemical Bonding
Once the resin has saturated the break, the technician applies a curing tab and a high-intensity ultraviolet lamp. The resin undergoes a photochemical reaction, cross-linking the polymer chains to the glass. This is not like waiting for paint to dry; it is a molecular change. After a few minutes of exposure to the correct UV wavelength (usually in the 365nm range), the resin is harder than the surrounding glass. The excess is then scraped away with a fresh razor blade at a ninety-degree angle, leaving a surface so smooth the wipers won’t even catch on it. This entire process, when done by an expert glass installer using professional-grade tools, takes less than twenty minutes and saves the homeowner hundreds of dollars in replacement costs.
Choosing the Right Mobile Service
Not all mobile service providers are equal. A true professional doesn’t just ‘fill the hole.’ They evaluate the type of break: whether it is a bullseye, a star break, or a combination. They check for ‘legs’ or radial cracks that might require a thin-viscosity resin to penetrate further. They ensure the work is done in a controlled environment or under a UV shield if the sun is too bright. The goal is to restore the refractive index of the glass so that light passes through the repair at the same angle it passes through the clear glass, making the damage virtually invisible. Don’t settle for a caulk-and-walk technician. Demand a specialist who understands the science of glazing and the importance of a structural bond.